Getting Started with EdukaAI
A step-by-step guide to managing your fine-tuning datasets
Installation
EdukaAI runs locally on your machine. No cloud accounts, no data sharing.
Option 1: Install via npm (Recommended)
The easiest way to get started. Installs globally so you can run edukaAI from anywhere.
 # Install globally via npm
 npm install -g @elgap/edukaai

 # Start the application
 edukaai
Or try it out without installing using npx:
 # Run without installing (npx will download and run)
 npx @elgap/edukaai
Option 2: Clone from Git (For Development)
Clone the repository if you want to modify the code or contribute to the project.
 # Clone the repository
 git clone https://github.com/elgap/edukaai.git
 cd edukaai

 # Install dependencies
 npm install

 # Start the application
npm run dev Dashboard Overview
Once running, open your browser to http://localhost:3030 to see the dashboard.
Total Samples
Track how many training examples you've collected
Average Quality
Star ratings help you identify your best data
Ready to Train
Indicator when you have enough quality samples
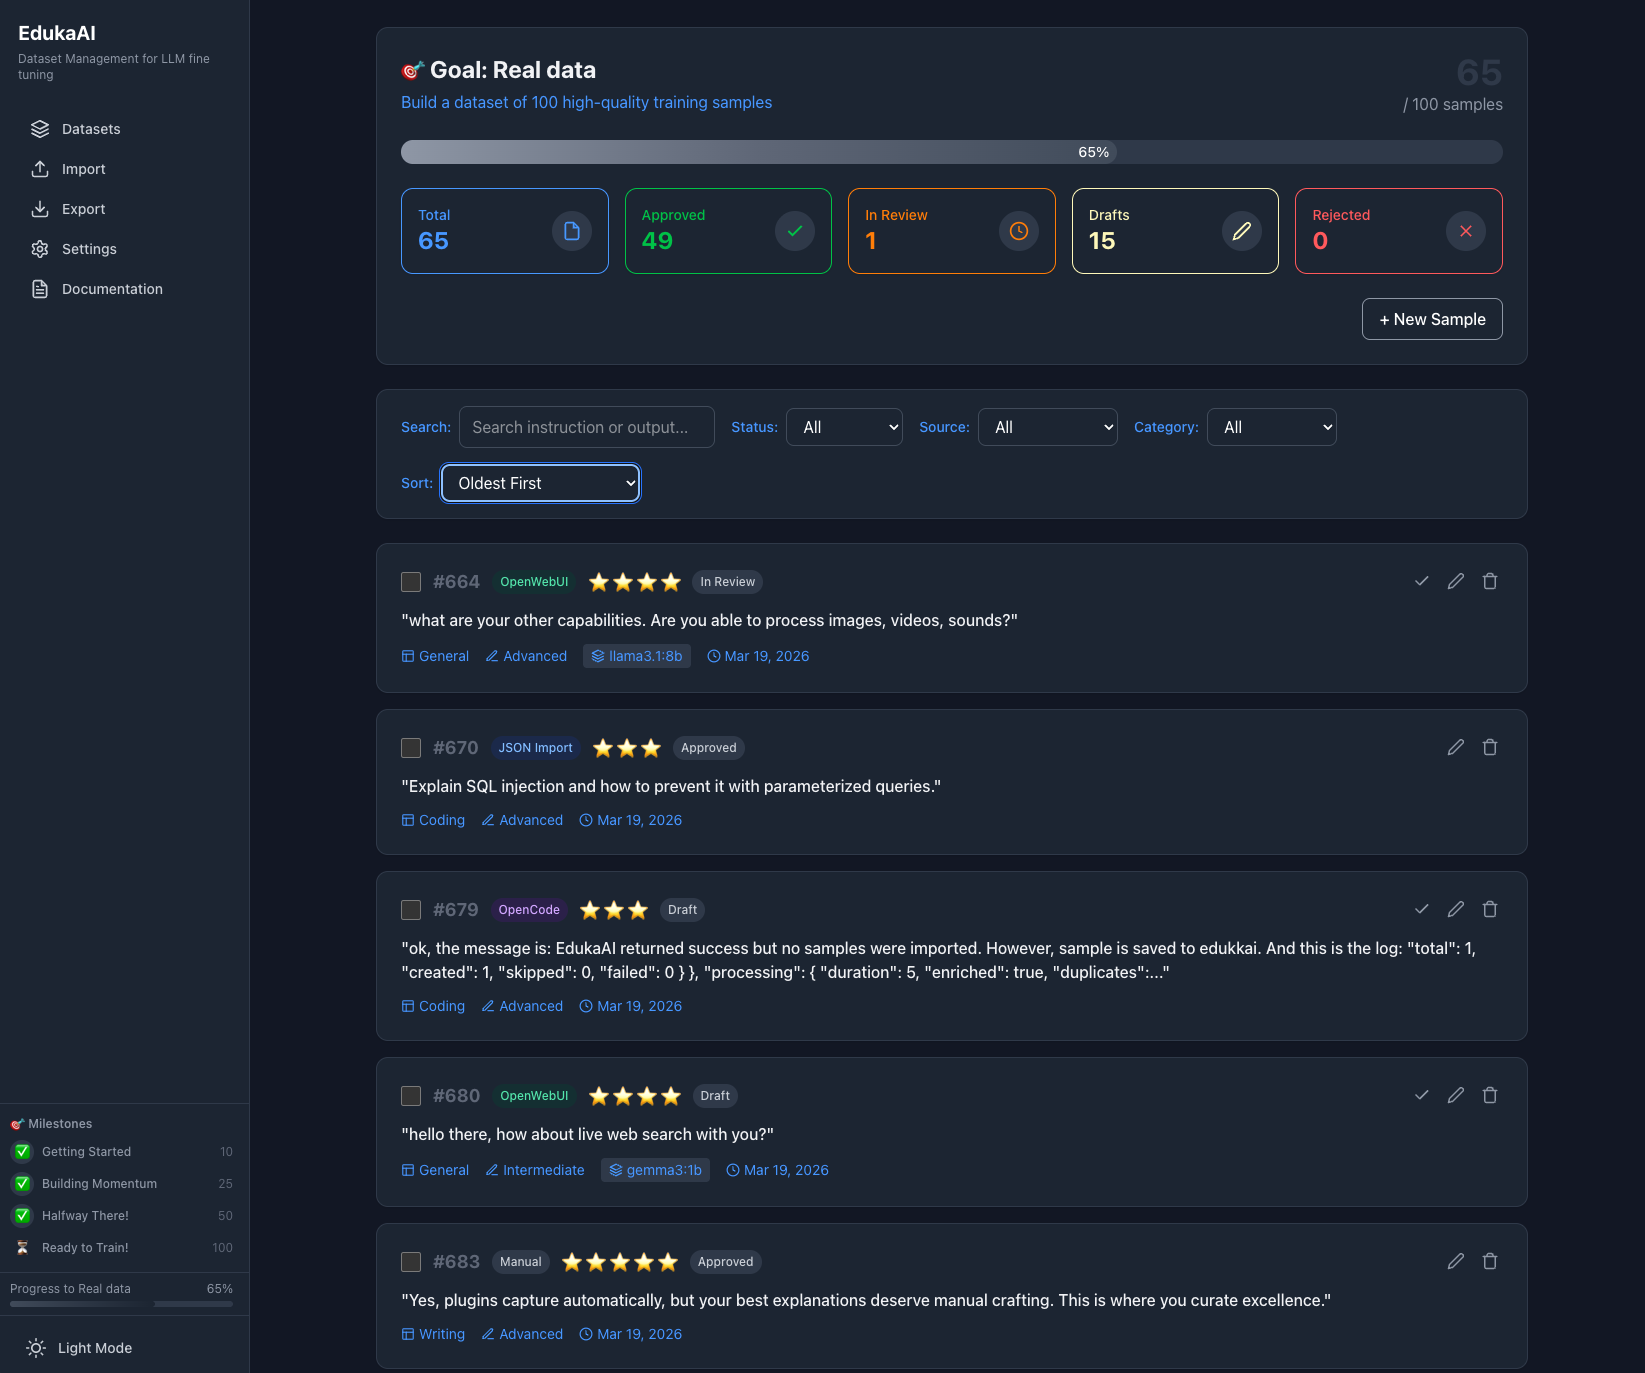
Importing Data
EdukaAI supports importing from multiple formats. Choose what works for your existing data.
JSONL Files
Standard format for fine-tuning. Each line is a JSON object with instruction, input, and output fields.
CSV/Excel
Import from spreadsheets with columns mapped to instruction, input, and output.
Markdown & Text
Parse documents and extract Q&A pairs automatically or manually.
Screenshot: Import dialog showing file selection, format options (JSONL, CSV, Markdown), and mapping configuration for columns
Live Capture via Plugins
Capture training data automatically while you work. Install plugins for your favorite AI tools and let EdukaAI collect conversations in the background.
OpenCode Plugin
Capture coding conversations automatically from OpenCode CLI. Install once, then every session is exported when complete.
View on GitHubOpenWebUI Plugin
One-click export from your self-hosted OpenWebUI. A button appears under each assistant response for instant capture.
View on GitHubPro tip: Combine multiple sources—use plugins for bulk capture and manual entry for your best explanations.
Creating Training Samples
Manually add high-quality training examples using the sample creation form.
Sample Structure
Explain the concept of memoization in React and when to use useMemo versus useCallback, with practical examples.
The user is a junior developer who keeps re-fetching the same API data on every render, causing performance issues.
Memoization is like having a good memory - instead of recalculating something every time, you remember the result from before.
useMemo is for expensive calculations: const expensiveValue = useMemo(() => computeExpensiveData(data), [data]);
Use it when: Computing the value takes significant time, and the inputs change infrequently.
useCallback is for functions: const handleClick = useCallback(() => { doSomething(); }, [deps]);
Use it when: Passing functions to child components that depend on referential equality (like React.memo children).
For your API fetching issue: Don't memoize the fetch itself. Instead, memoize the result using useMemo, or better yet, use a proper data fetching library like React Query that handles caching automatically.
Screenshot: Sample creation form with fields for Instruction, Input, Output, tags, and quality rating. Shows validation and preview of how it will look.
Quality Curation
Not all training data is equal. Use the star rating system to mark your best examples.
Perfect examples that demonstrate exactly what you want the model to learn. Include these in training.
Decent examples but might need editing. Consider before including.
Weak examples with issues. Either fix them or exclude from training.
Bad examples that would teach the model wrong patterns. Never train on these.
Screenshot: Sample review interface showing a card with Q&A content, star rating selector (1-5), tag input field, edit button, and approve/reject actions
Remember: 20 excellent examples will outperform 200 mediocre ones. Quality beats quantity in fine-tuning.
Organization & Tags
Keep your dataset organized with tags and categories as it grows.
Screenshot: Dataset view showing filter sidebar with tag cloud, quality rating filter, and search. Sample cards display their assigned tags.
Export for Training
When your dataset is ready, export in the format your training tool expects.
Alpaca Format
Best for instruction fine-tuning with Ollama, Axolotl, and most frameworks.
instruction / input / output ShareGPT Format
Conversation-style format for chat-based fine-tuning.
conversations array with role/content JSONL
Maximum flexibility. One JSON object per line, customizable schema.
Screenshot: Export dialog showing format selection (Alpaca/ShareGPT/JSONL/CSV), train/validation split slider (default 80/20), quality filter (only 4-5 star samples), and download button with file size estimate
Connect to Training Tools
EdukaAI provides the dataset. You choose your training framework.
Ollama (Easiest)
Local training on Mac, Linux, Windows. Simple Modelfile creation.
Axolotl
YAML-based configuration. Great for reproducible training runs.
Unsloth
Fast training with LoRA. Best for NVIDIA GPUs.
MLX (Mac)
Apple's framework for Apple Silicon. Optimized for M1/M2/M3.
Summary: The EdukaAI Flow
1. Install - Run locally with npm
2. Import - Bring in existing data or start fresh
3. Create - Add high-quality training examples
4. Curate - Rate, tag, and filter your samples
5. Export - Download in your training format
6. Train - Use Ollama, Axolotl, Unsloth, or MLX
Your data never leaves your machine. EdukaAI is 100% local, private, and open source.